Have a Happy!

Back in August, I posted about my staycation with my girlfriends, and I had everyone send me their photos, and I would put together a book for everyone. I forgot to add a cover in my excitement to submit the book.


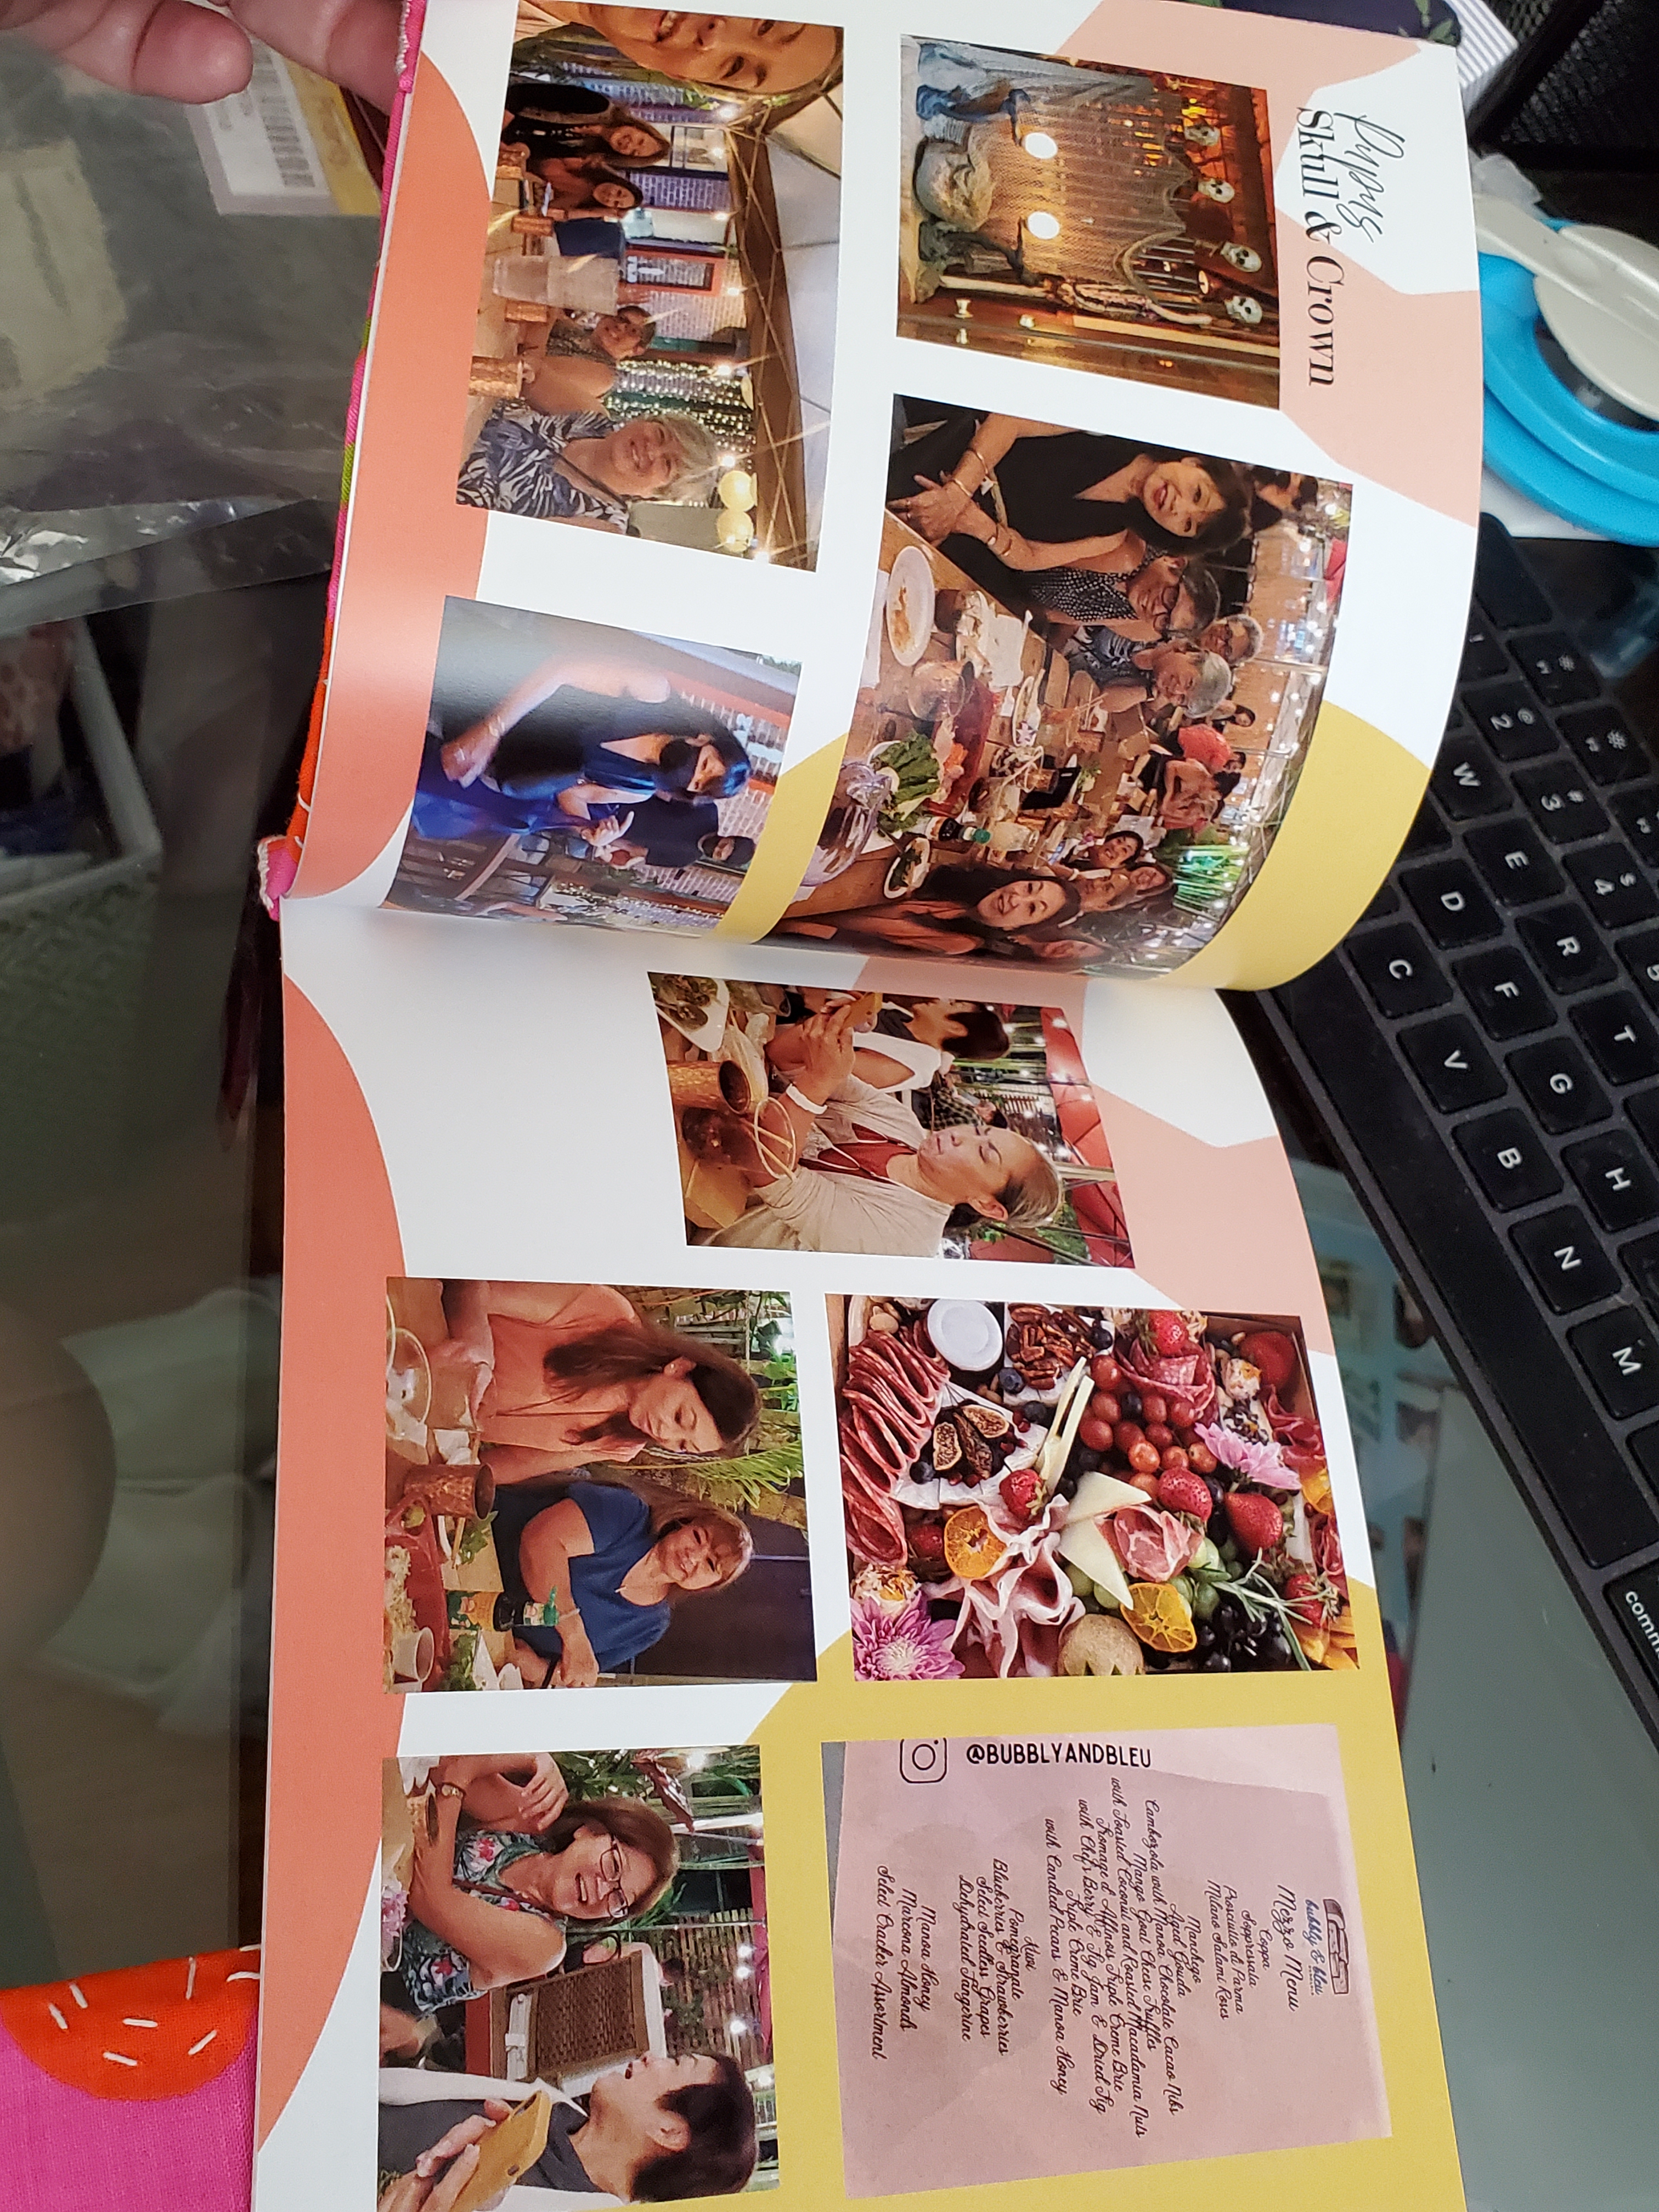
I had 11 coverless books and was not sure what to do. Many ideas ran through my head, and none of them sounded like a solution. And I decided to put it away till something came to me. Fast forward four months, and I have an idea. I would make patchwork covers that could be slipped on. I got the idea because I was getting together with the girls the coming Sunday, two days away! Yes, I procrastinated. I feel like I’m still in high school.
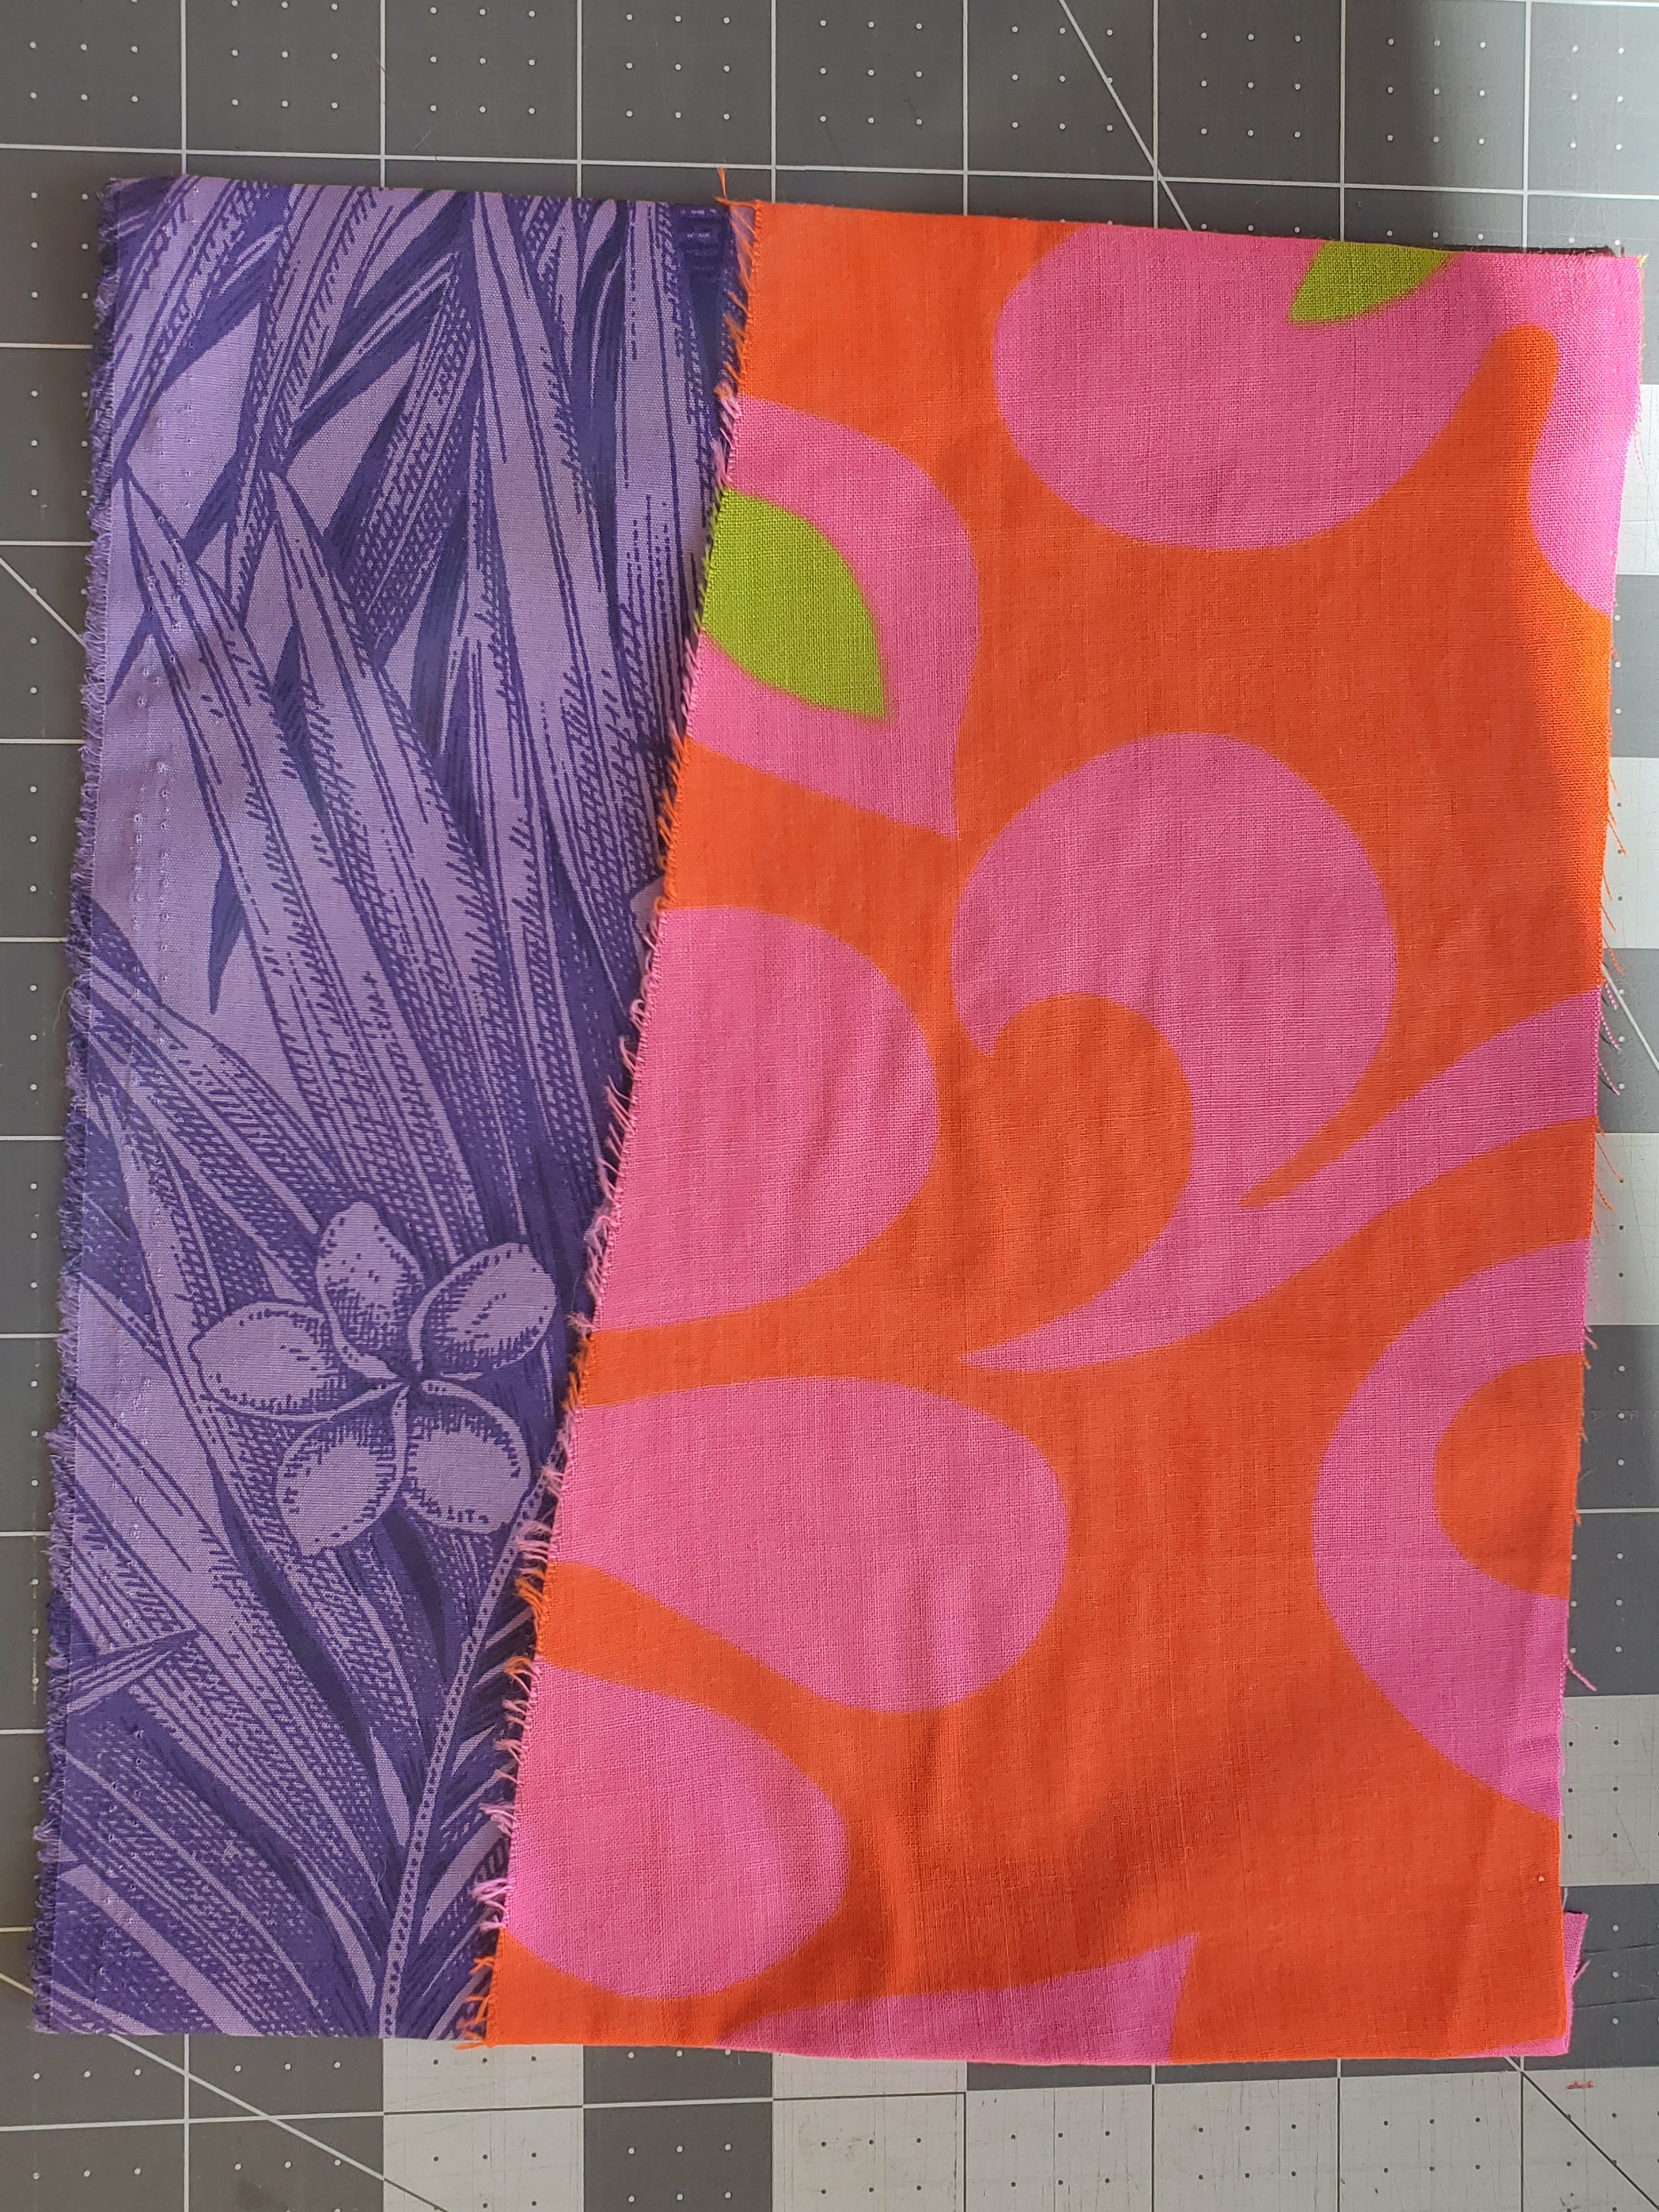
I wanted to make the cover colorful and fun, like the interior. I thought a vintage flower print and purple Hawaiian print would make a great combination. The vintage print was large triangular scraps. That drove the layout of the fabric. I needed to make sure I had enough for all the covers, and I was trying to keep them similar to keep the production time done.
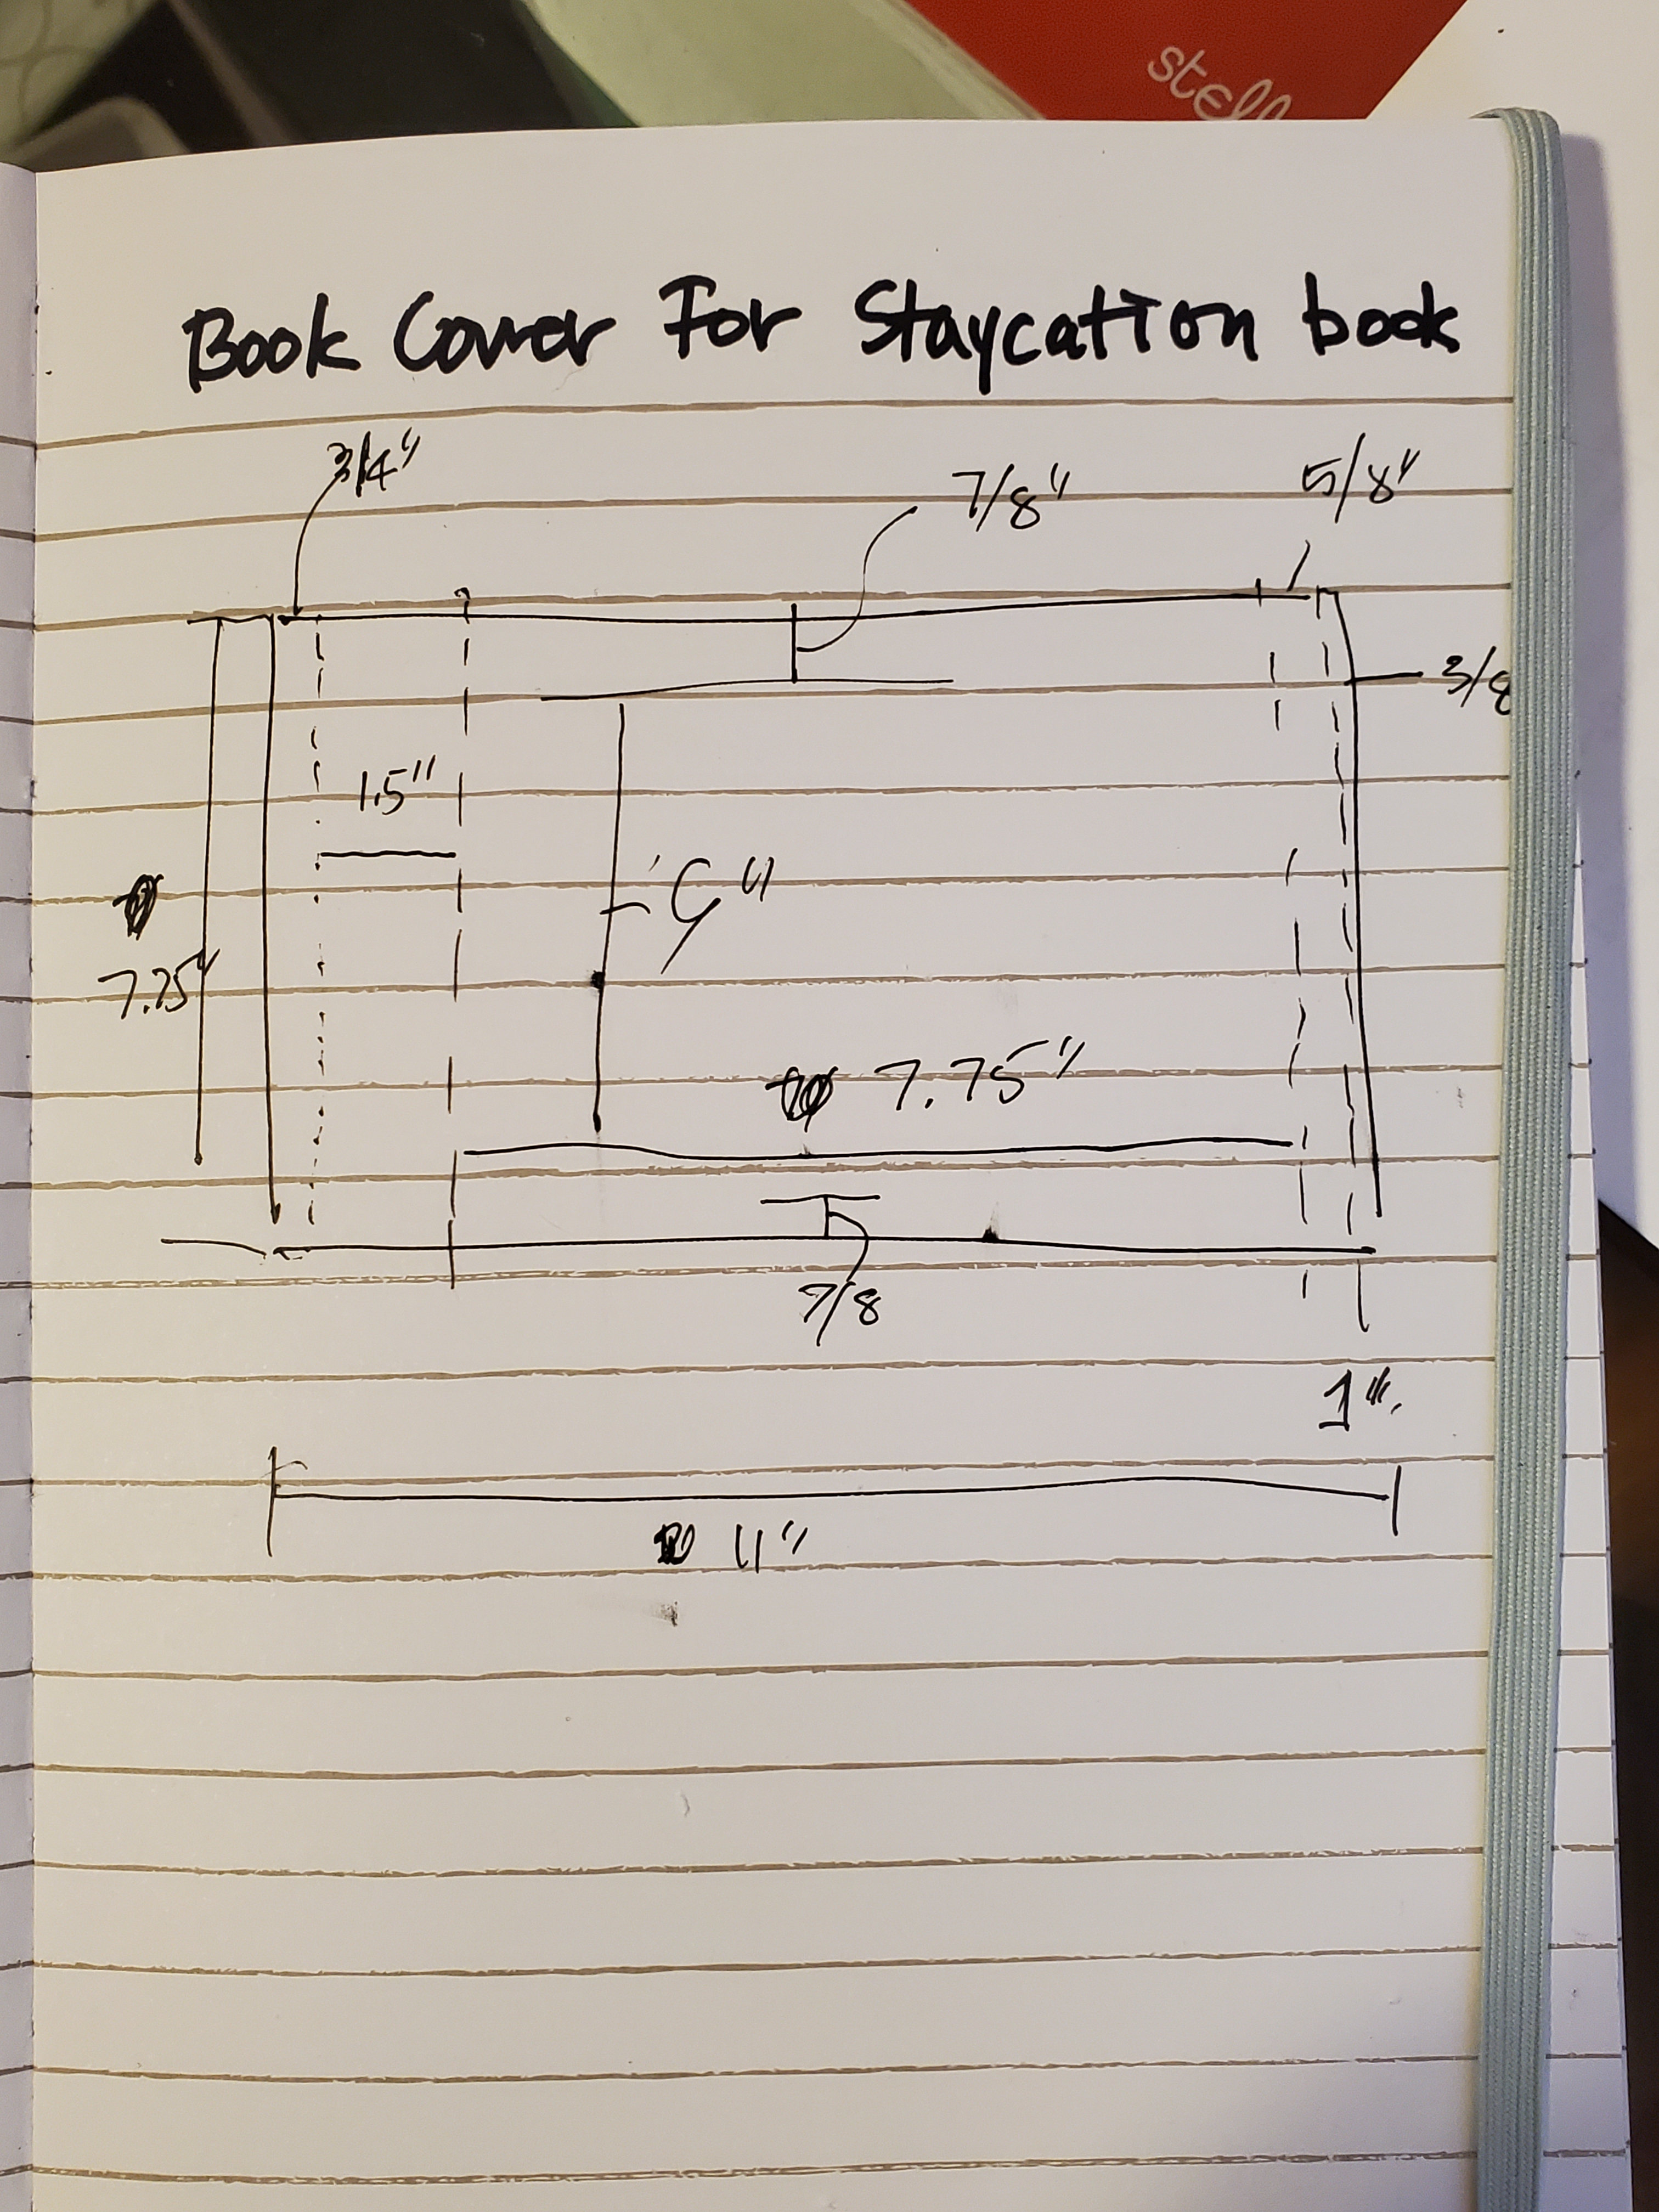
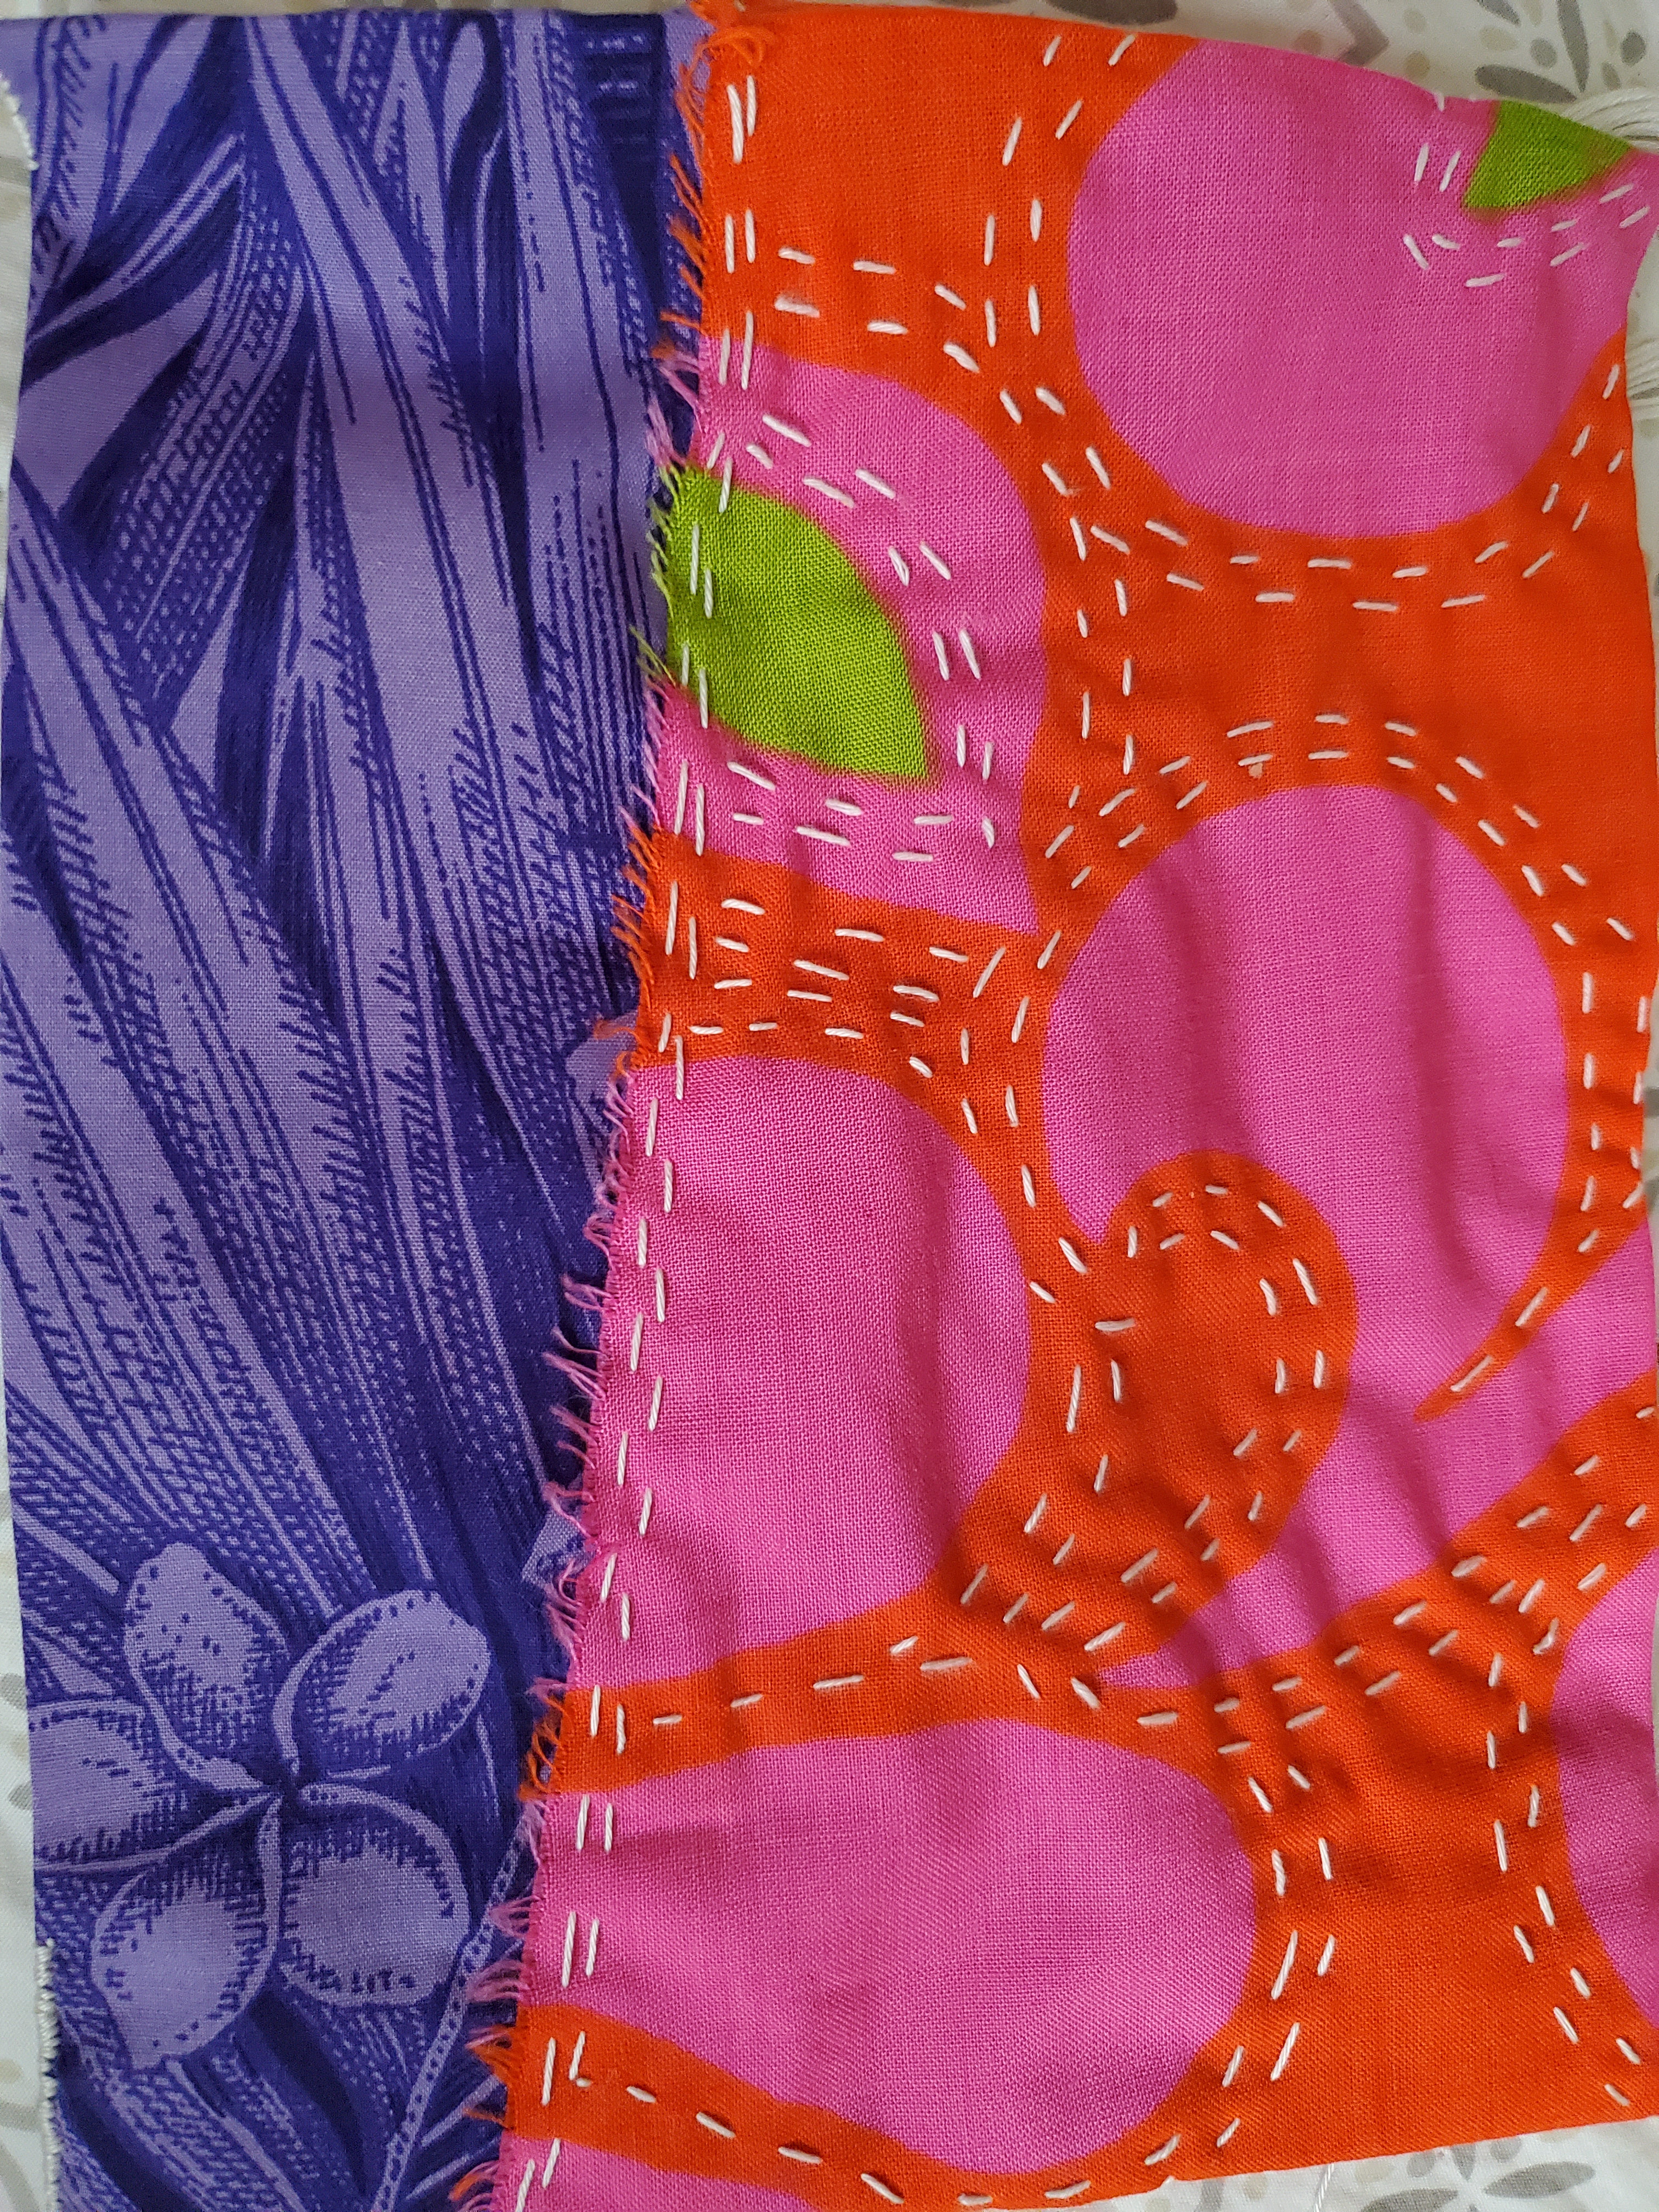
Once the covers were cut, I decided to sashiko stitch (Japanese embroidery) to attach the two fabrics only on the pink fabric. I came up with a pattern to do two rows of stitching around the pink shapes. I decided the front cover would slip into the book cover pockets. I made pockets for both spine and the right edge of the cover. I initially wanted to glue the covers to the book, but I didn’t know how the paper would react to the glue, and I had no time to test. I stitched the sides of the pocket with kind of a wrapping stitch (not sure what it is really called) that I’ve seen on Instagram.


Well, I didn’t make my deadline of having it done by our brunch. I had two done for the girls who live in town, and the rest would get it delivered. But we ended up spending the afternoon on my girlfriend’s patio talking, and I was able to make up six more.

I enjoyed the hand stitching patchwork part of this project and have started another stitching project with leftover scraps. I will post when I’m done with what I made.

I saw a post from Modern Daily Knitting about marling; the image intrigued me, and I made a mental note to go back to look at it. Well, several days later I couldn’t find it. So I googled Marling and found a post about marling on Tin Can Knits and a quick and easy hat pattern to try out the technique.
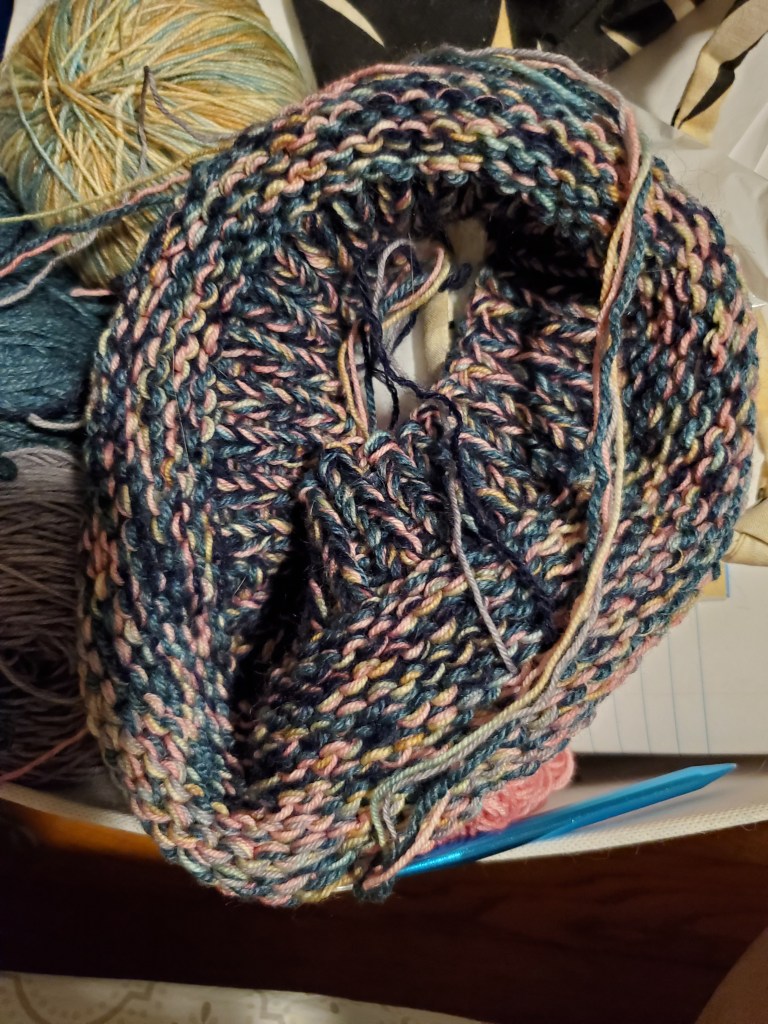
Marling is knitting holding 2 or more different strands of yarn to create a speckled fabric. I tried out his technique with mostly the same weight of yarn I had in my stash. I knew I wanted to do something with an ombre and decided to get the Snap hat pattern to try out this technique. I’ve been looking for a quick pattern during my rest periods between sections from my Shawlography Westknits MKAL 2021. Haha.
Here’s what I got. One of the benefits of this marling project is I got to use yarn from my stash, and it turns sock and lace weight yarn into bulky to make knitting up the hat a quick and very satisfying project.

Most of the yarn I got from Savers, only the variegated yarn, was from my yarn gift from a friend who was getting rid of most of her stash. My plan was to do an ombre from dark to light. The pattern said to change the one yarn every 4-6 rows to create the ombre.

After 6 more rows, I switched out the teal with medium magenta. I continued with this colorway till the decrease section. Then I swapped out the variegated yarn with another strand of pink.


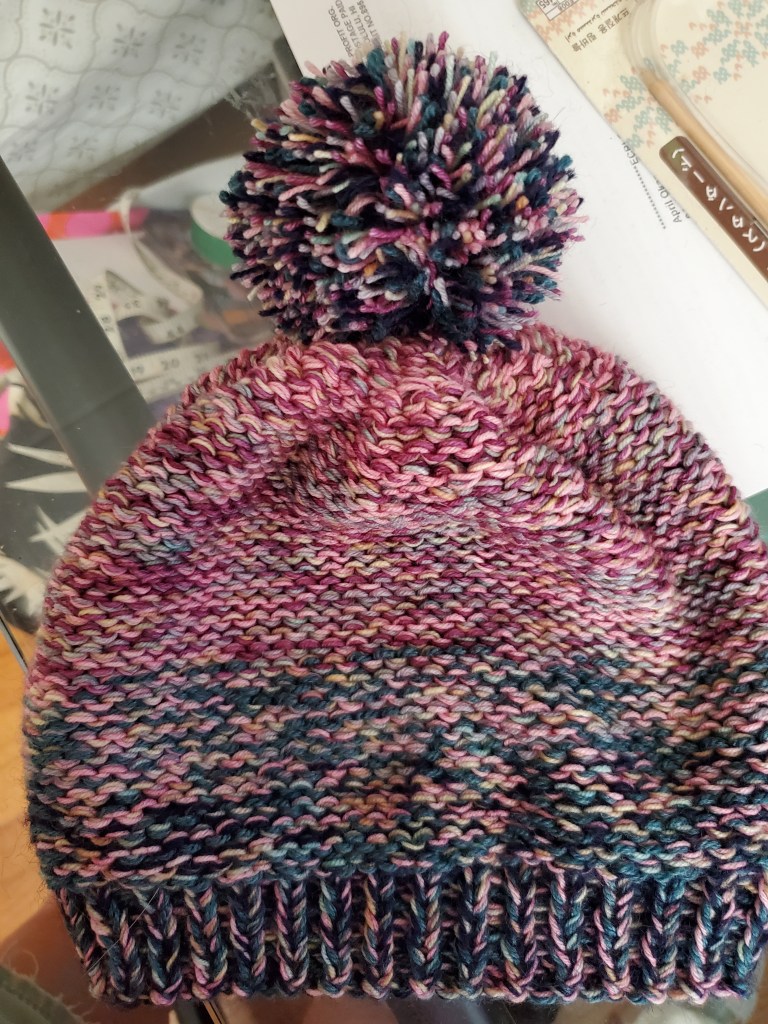
Ta-Dah! My finished Snap hat with a big fluffy pom-pom in all 6 colors. Love the way the ombre turned out. I would love to make a blanket with this technique. I’ll just add it to my to-do project list and look out for a colorful sock or lace yarn sale.

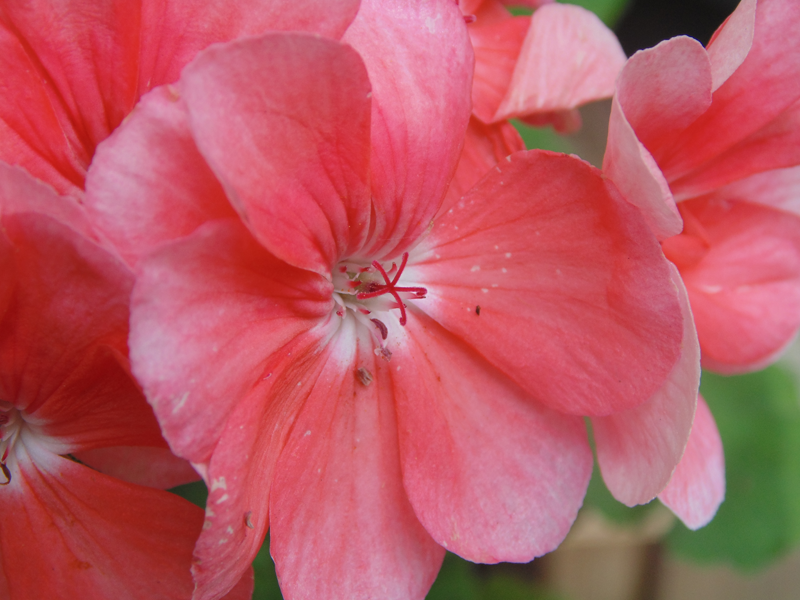
Back in New Jersey, I had gangly geranium that was started from seed. My mom sprinkled seeds in a pot on one of her spring visits and to my surprise, I found a little seeding near the end of summer. Growing inside during the winter, gave its gangly-ness due to the filtered winter light. But for all its legginess, it produced the most beautiful blossoms. They look like cherry blossoms.
I just started a plant from the seeds from this geranium here in Hawaii. The blossoms aren’t as beautiful but I’m giving it time to come into its own.