If you look up stitching or mending, you may notice the term slow stitching. For me, slow stitching is a mindful practice to keep my anxiety at bay and to create and learn something new.
This spring, I found an online workshop called Making Zen from https://www.zenstitching.ca/ with demonstrations of all different stitching techniques and processes. The workshop lit a fire in me, seeing what others were creating out of stitching and mending. I posted about the blanket stitch technique I used on my scrappy jeans trivet in Seams and Scraps.
I’ve recently started doing random stitching projects involving upcycling items being tossed out. They still had a lot of life in them. It would be my job to address the staining, broken zipper, hole, or tear to have another round of enjoyment by someone.
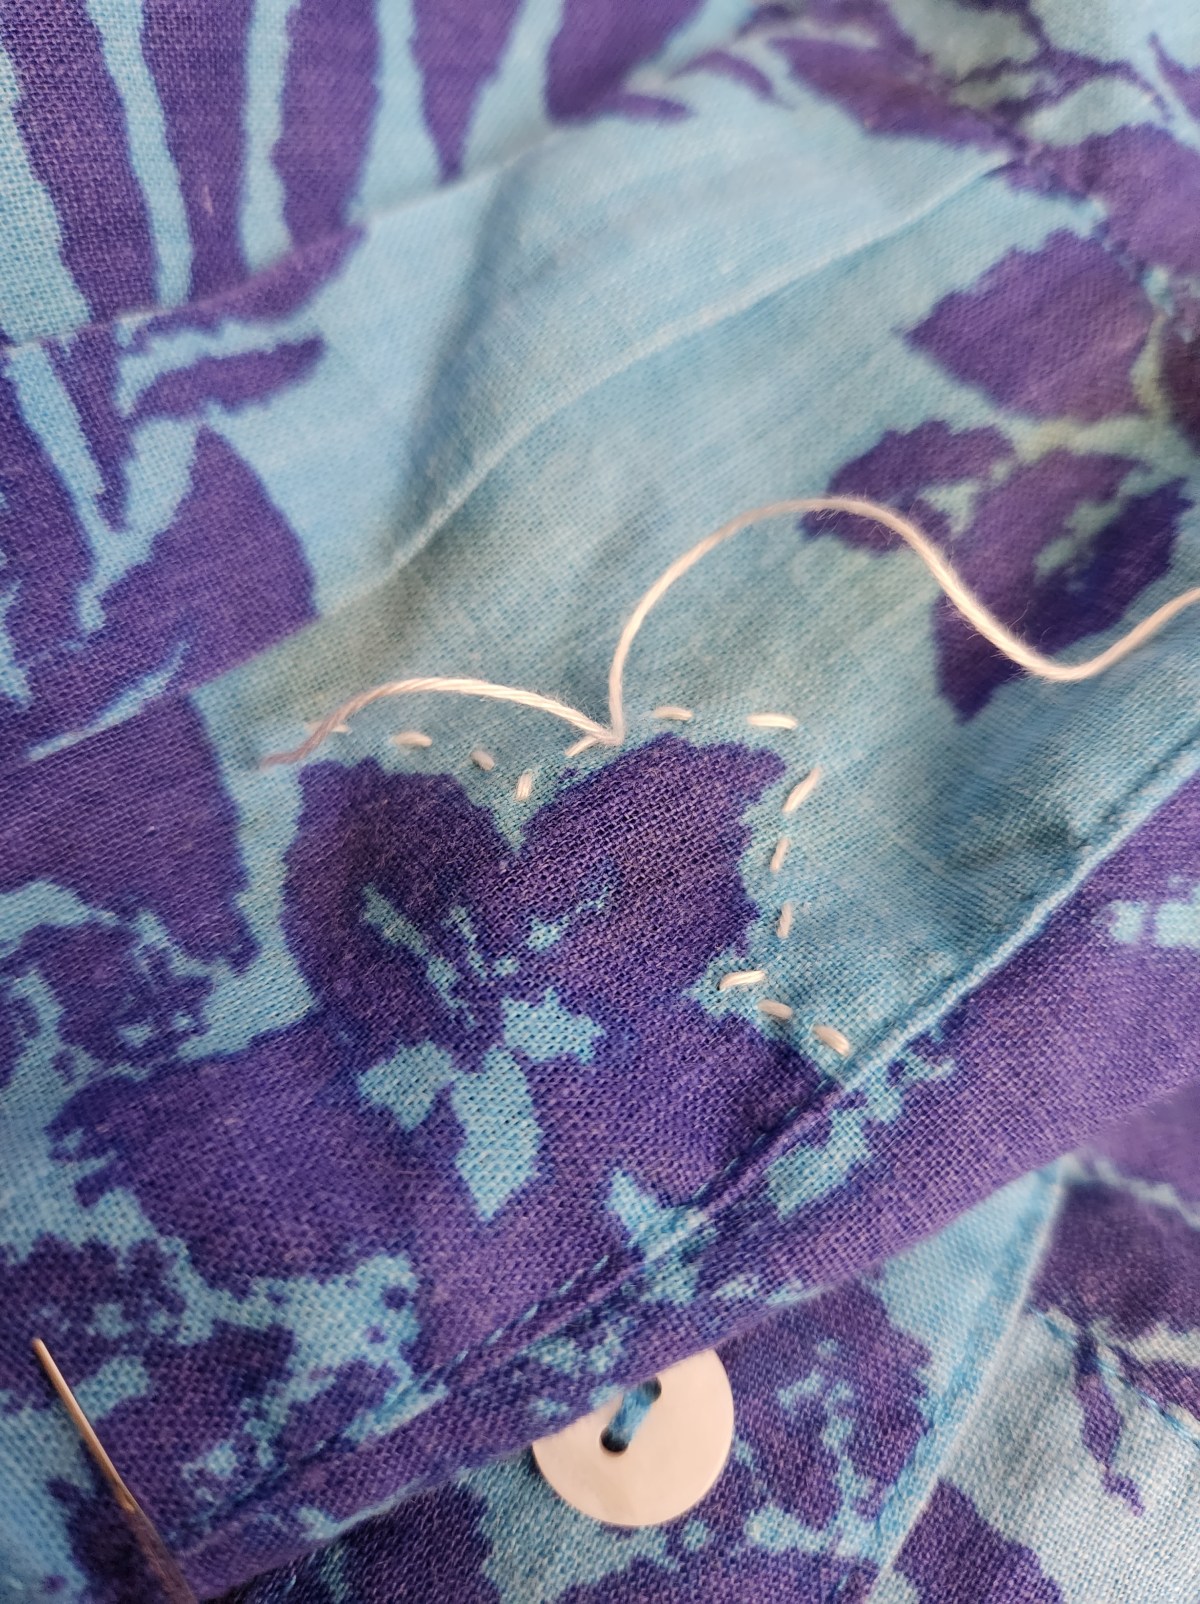
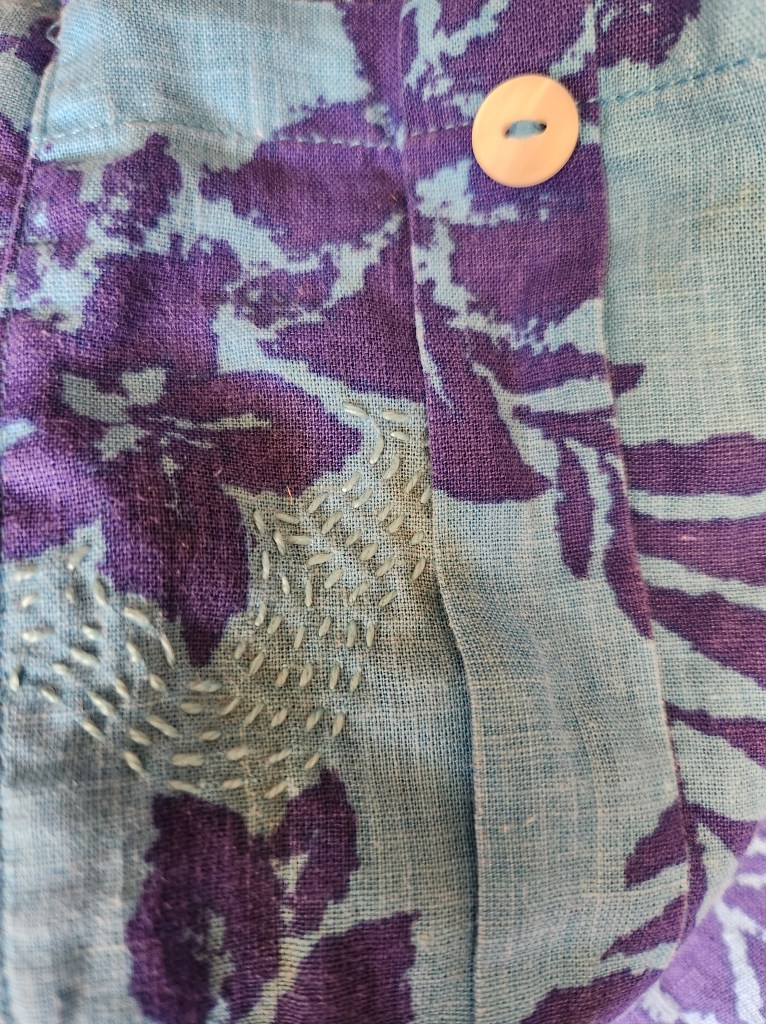
Aloha Shirt
I got this long sleeve aloha shirt from the 2 for a $1 bin. Its only real problem was a brownish stain on the front pocket area. I had an idea about using a running stitch technique in a lighter blue to disguise the staining.
What do you think? Was it a success?
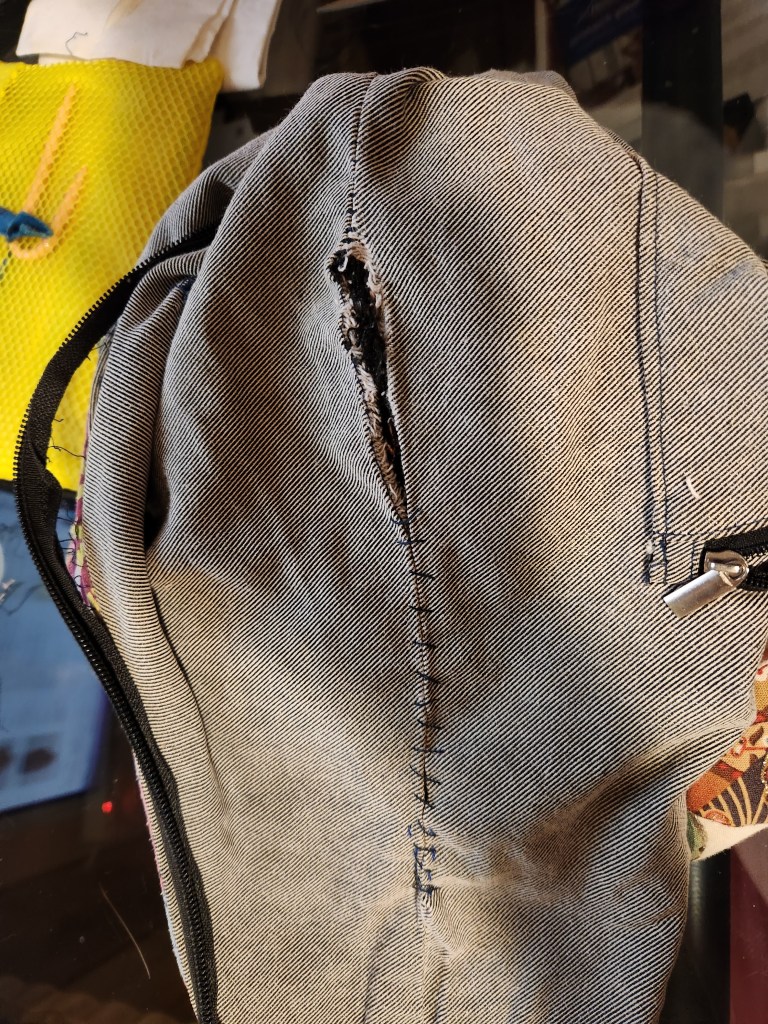
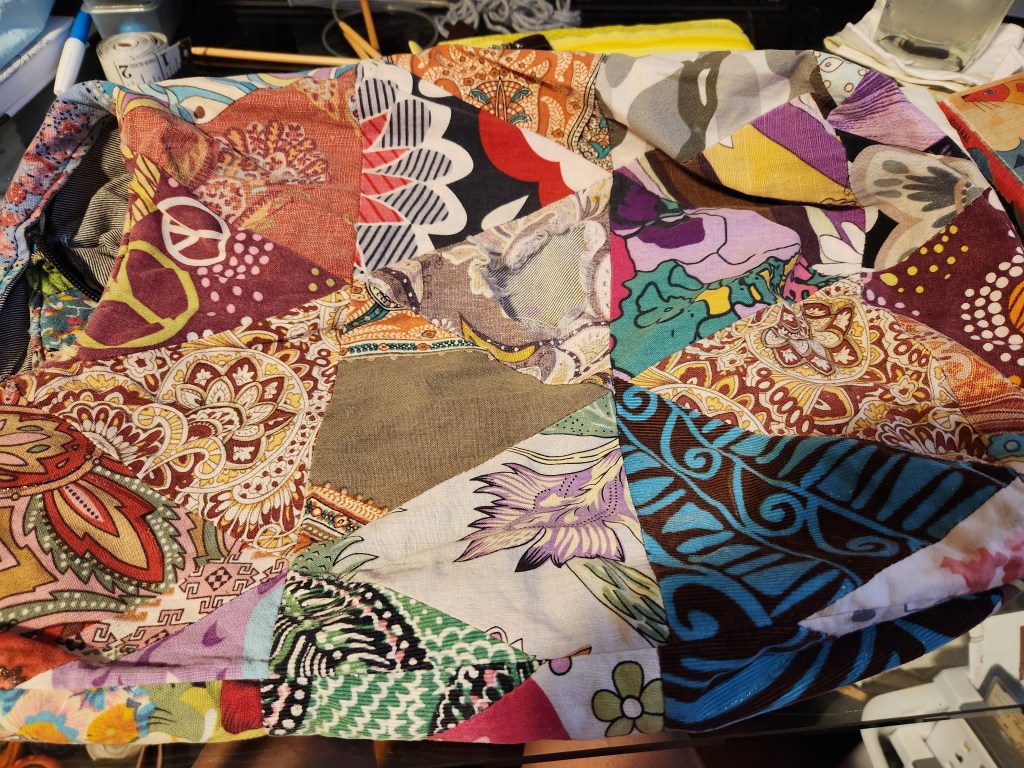
Slouchy Hippy bag
I should have put this bag out to pasture. Broken zipper, tears, and staining on the inside, especially on the big pocket. I saw its potential to continue to carry things.
The patchwork was the reason I kept it.
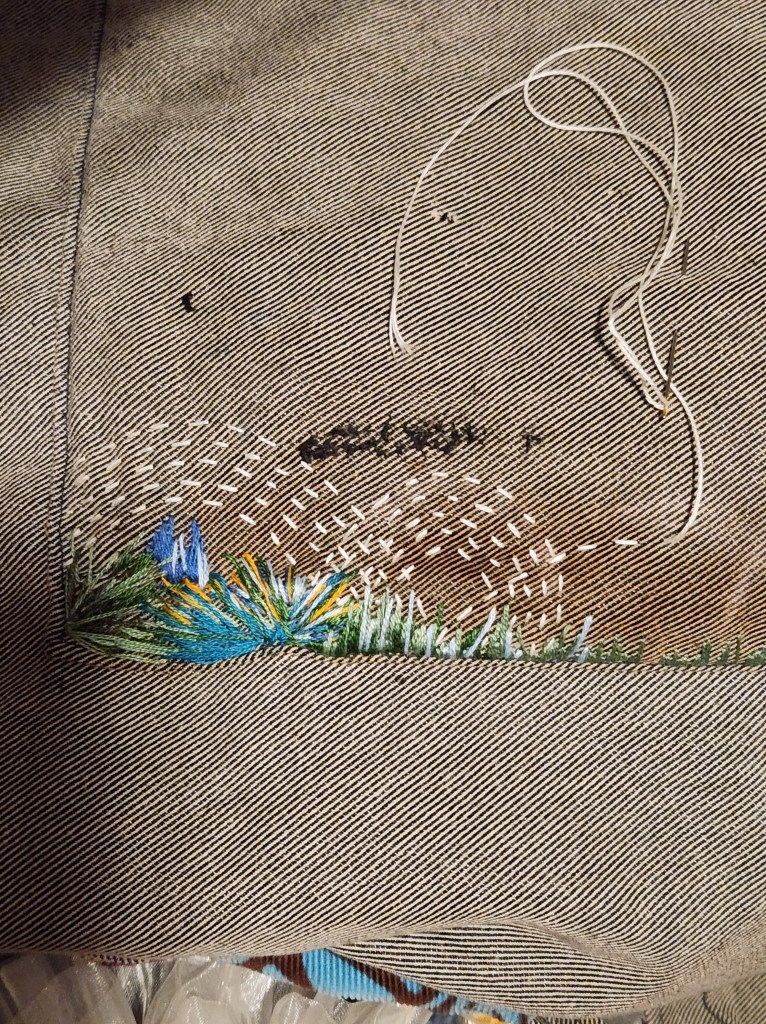
I decided to address the staining on the inside pocket. I didn’t have a real plan, but I knew I needed heavier coverage at the bottom, with most of the staining. I don’t know what this stitch is called, but I’ve used it with flowers and grass. I like adding other colors to give it more depth. It is still a work in progress.
I’m hoping the black snags with work into my stitch.
I’ll post more when I start working the outside, patching up the holes. Then I’ll tackle adding a working zipper back again. Stay tuned.
I’ve been working on several upcycling projects, and I’m proud to show you what I’ve done. I worked with a couple of jeans and a batik print dress. I started out with the jeans, one dark, and one light denim. I decided to try out the denim whale I’ve seen on Pinterest. I got the pattern from FourSixtyTwo.
The Denim
Mom’s capri jeans
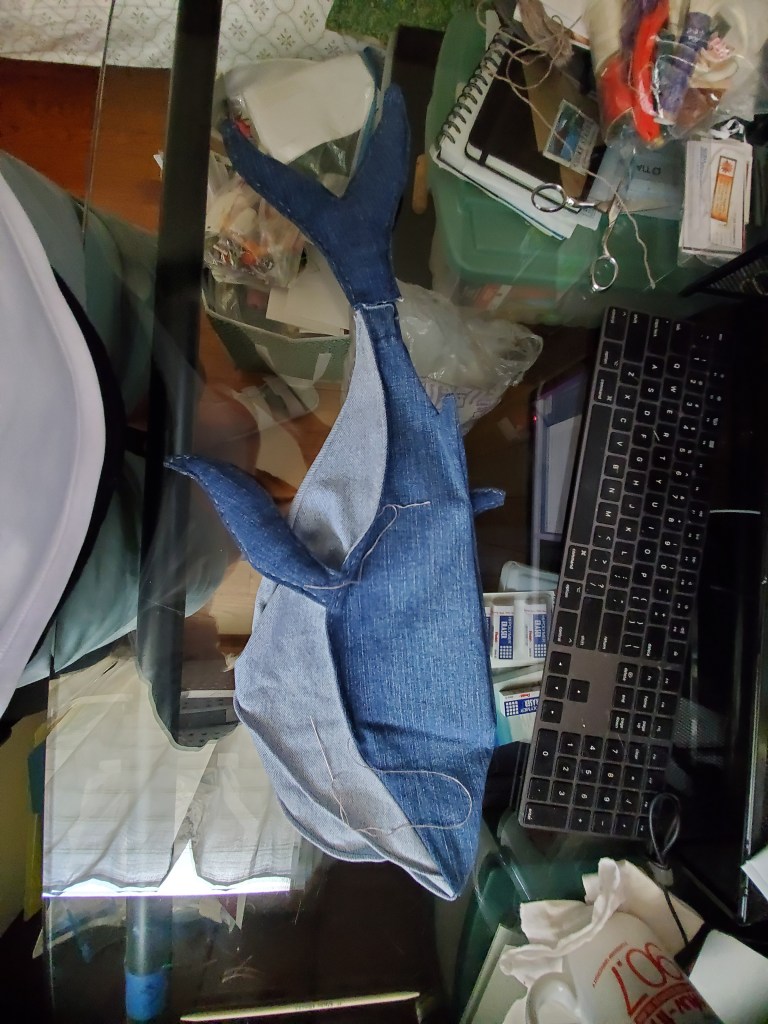
I had two pairs of jeans, mom’s capri jeans and old pair of acid-washed ones. Yes, acid-washed, and it had a high waist and pleats. It was straight from the 80s. The first task is to take apart the clothing. I cut the legs off on the jeans, getting as much of it as possible. I’ll save the top of the jeans for later for another project. I then rotary cut the seams and put them aside to see if I could come up with a use for them. I also took off some buttons from the darker jeans. I used the darker jeans for the top of the whale and the acid-wash for the belly. I started out machine sewing, starting with the tucks on the stomach. So far, so good. Then I started on the fins and tail. It was a no-go when turning it to the right side [for all the non-sewers, you sew the pieces together with the right sides facing together, stitching on the wrong side]. The pointy tips looked bulky and bumpy because of the thickness of the denim. Boo! Instead of fighting with the seams, I ripped out the stitches and decided to hand-stitch the tail and fins [for the hand-stitching, it is sewed right side out]. Then I continued with the hand-stitching with the top-stitching on the tail and fins, and to be consistent, the body, once I attached it to the body.
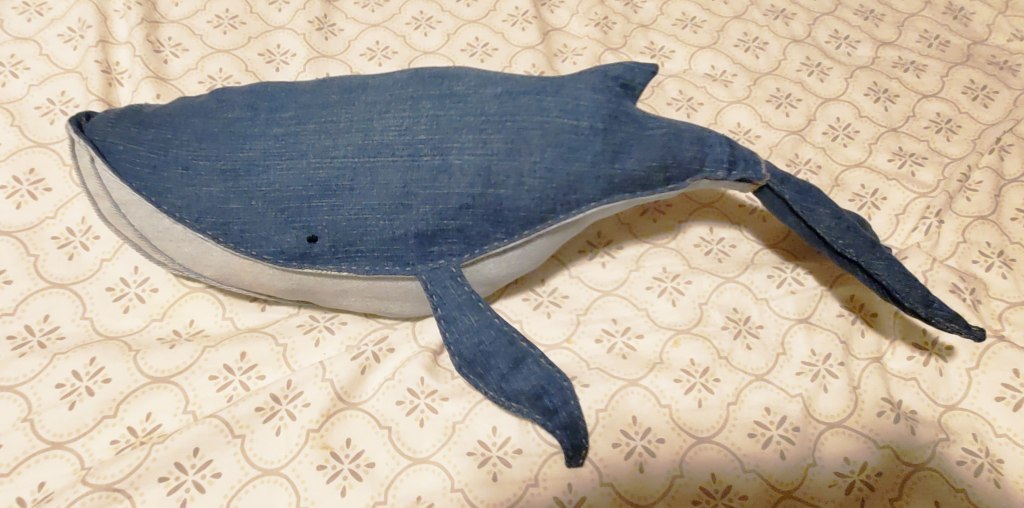
tail pinned for hand-stitchingtop-stitchedready to be stuffedTah Dah! Whale #1: with pleats on the belly
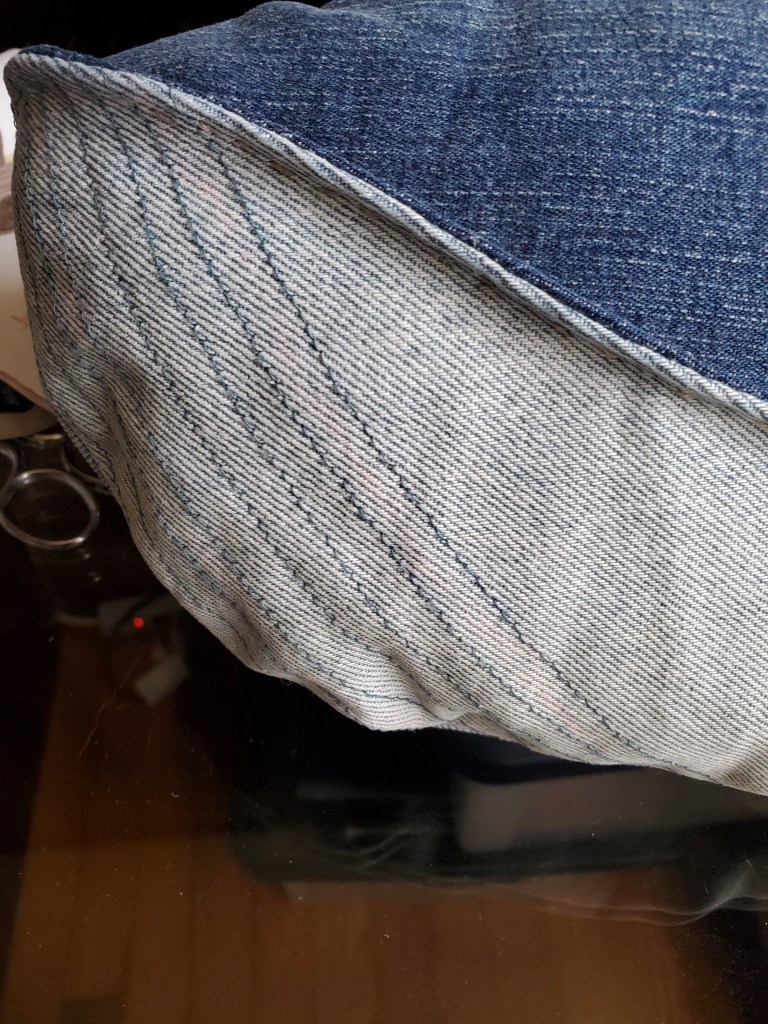
Wow! I liked the look of the finished product. I decided to do another whale because I had enough fabric. I made a few adjustments to the pattern to help the points of the tail and fins lay better. I also decided to try eliminating the pleats on the belly and machine-stitched the underbody instead. And for Whale #2, I hand-stitched the entire whale except for the top-stitching on the underbody.
Closeup of the machine-stitched underbody
Batik Dress
batik dress from the 80s
I thought the whale would look great in a print, maybe an aloha print. I liked the gray and navy section of the dress for the whale and thought the bleached pattern looked like marks on the whale. The fabric was rayon; it was soft and flowy. I lined all the pieces with some lightweight material to give them stability.
The lined pieces were lighter than the denim, so I decided to use the machine on the larger sections of the whale. I added top-stitched the underbody where the pleats should be, then stitched the underbody together. I handstitched the fins and tail together to keep the points sharp, lay flat, and added top-stitching.
machine top-stitching on underbodystuffed whale and Orange the cat
Hand-stitching
I took a stitching workshop in May through Zen Stitching to get inspired. It was five days of classes. I was able to take almost every session I wanted to. I loved that I found others who combined upcycling, boro, and hand-stitching.
I added a few techniques to the whale. I added groups of running stitch using a bleached print to inspire the pattern. I also added French knots. I like how it came out. Now, if I can only get these posted on my Etsy shop.
Adding hand-stitching to the underbodyHiding the endshandwork